Originally, the mister and I bought new night stands and a new dresser at Ikea, thinking it would work just dandy. It turns out that we have more clothes than I thought! Even with a new huge dresser, we were still using the shelves I was hoping to get rid of in the closet. I didn't want to spend another $300 on a dresser, so I used the one we had!

Here's what I was workin' with...It was pretty and I love the shape and size, but the veneer was chipping, the top was cracking and it was in rough shape!
I did a LOT of research to find out how to paint and distress old furniture because I wanted this to come out great! Usually when I "refinish" furniture it involves a quick coat of sloppy spray paint and I call it good. But, because this piece was given to me by Callie's grandparents back when I was a single mom in need of furniture, I wanted to do the job correctly!
So instead of a week, this puppy has taken me almost a month to refinish. I think if I was actually working on it everyday, I could've gotten it done sooner, but this was a nap time/week day project.
First I sanded...
I sanded and sanded and sanded! All afternoon long with 60 grit sandpaper and my awesome guns, until I thought my arms would fall off.
I contemplated using the stuff that you spray on and scrape off, but I was worried that it would damage the veneer, so the old fashioned way it was!
I wiped the dust, vacuumed the dust and I may have gotten out Brien's compressor and blew the dust off. (I totally did)
Then I primed...
This stuff is awesome!
I primed and primed and primed and using a regular old bristle paint brush, three coats and three days later we were ready for paint!
I used a paint mismatch from Lowe's and it was weird stuff. I don't know if was the kind of paint or what, but it seemed really thick, despite the texture it didn't cover very well, but I liked the color and it was $5!
So I painted...
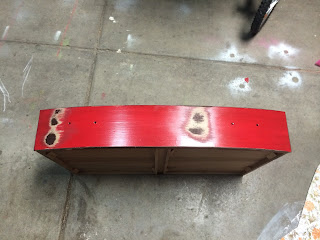
I painted and painted and painted! Until I used up the whole darn can! Thankfully it was just enough for 4 coats of red-paint. I probably should have tinted the primer, but you know, hindsight!
Next I sanded and distressed. I got a little carried away here...I sanded down the edges using a palm sander and more 60 grit sandpaper and did spots on the top and sides and thought I should probably do the drawers to match. It's a little much, but the damage is done now and I actually really like how it came out!
I roughed up the red paint pretty good and then I stained it! I love how the stain deepened the paint color and made the primer showing through kind of an antique-y white.
Here is the stain I used...
I just brushed it right on the whole surface using a cheap-y foam brush and then wiped it off after about 2 minutes with paper towel. I had to make peace with the fact that I was going to use up a whole roll of paper towel.
Letting it set...
Wipe it off, Voila!
After I finished the staining and distressing, I decided to seal it with Polyurethane. I have never used poly before, I am kind of an amatuer, but it is really cool stuff! I feel like the dresser can take a lot more wear and tear now!
After 3 coats, 1 a day for 3 days and then a week to cure. It's done!!!
I am so excited about my first "real" refinish job! I love it and it looks so great in our room!!!
I was going to replace all of the knobs and pulls, but the drawers are curved and the holes are a weird distance from each other, so I bought new glass knobs for the top drawers and reused the original pulls on the rest. I think it came together great!
Done and done! I am really excited for our last bedroom project and then our Master bedroom will be complete!!


No comments:
Post a Comment