Showing posts with label recipes. Show all posts

Wednesday, October 5, 2016

Zucchini Cake

 Due to an abundance of over sized zucchini I HAD to make this treat! Yummy-o! This was so delicious for Sunday dinner dessert a few weeks ago, I have been dreaming about ever since.

I realize that zucchini is not a fan favorite around my house, but it seems like when I put vegetables in dessert that I am somehow making it a little more healthy! Right?!?

So this recipe is pretty straight forward you need:

For the cake:
3 cups of flour
3 cups of white sugar
1 tsp of salt
1 1/2 tsp of baking soda
1 tsp of baking powder
2 tsps cinnamon
1 tsp of allspice
1 tsp of nutmeg
1 tsp of cloves
1 tsp vanilla extract
3 eggs
1 1/2 cup of vegetable oil
3 cups of shredded zucchini

For the frosting
8 oz package of 1/3 fat cream cheese (softened)
1/2 cup of butter (softened)
2 1/2 cups of powdered sugar
2 tsps of cinnamon
3 tsps of Turbinado  sugar

Preheat oven to 350.

First shred up all the zucchini...
Wowza! My mama knows how to grow em!

Peel that bad boy!

Shred it right up using a cheese grater!

Whisk together all of the dry ingredients (flour, sugar, salt, baking soda, and powder and spices) in a medium sized bowl and then all of the wet ingredients in a large bowl (oil, eggs, vanilla)

Add the dry ingredients gradually to the wet ingredients. I used a good old wooden spoon for this step!

Next fold in the zucchini until combined. It's a weird texture with the cake mix and zucchini, but just go with it!
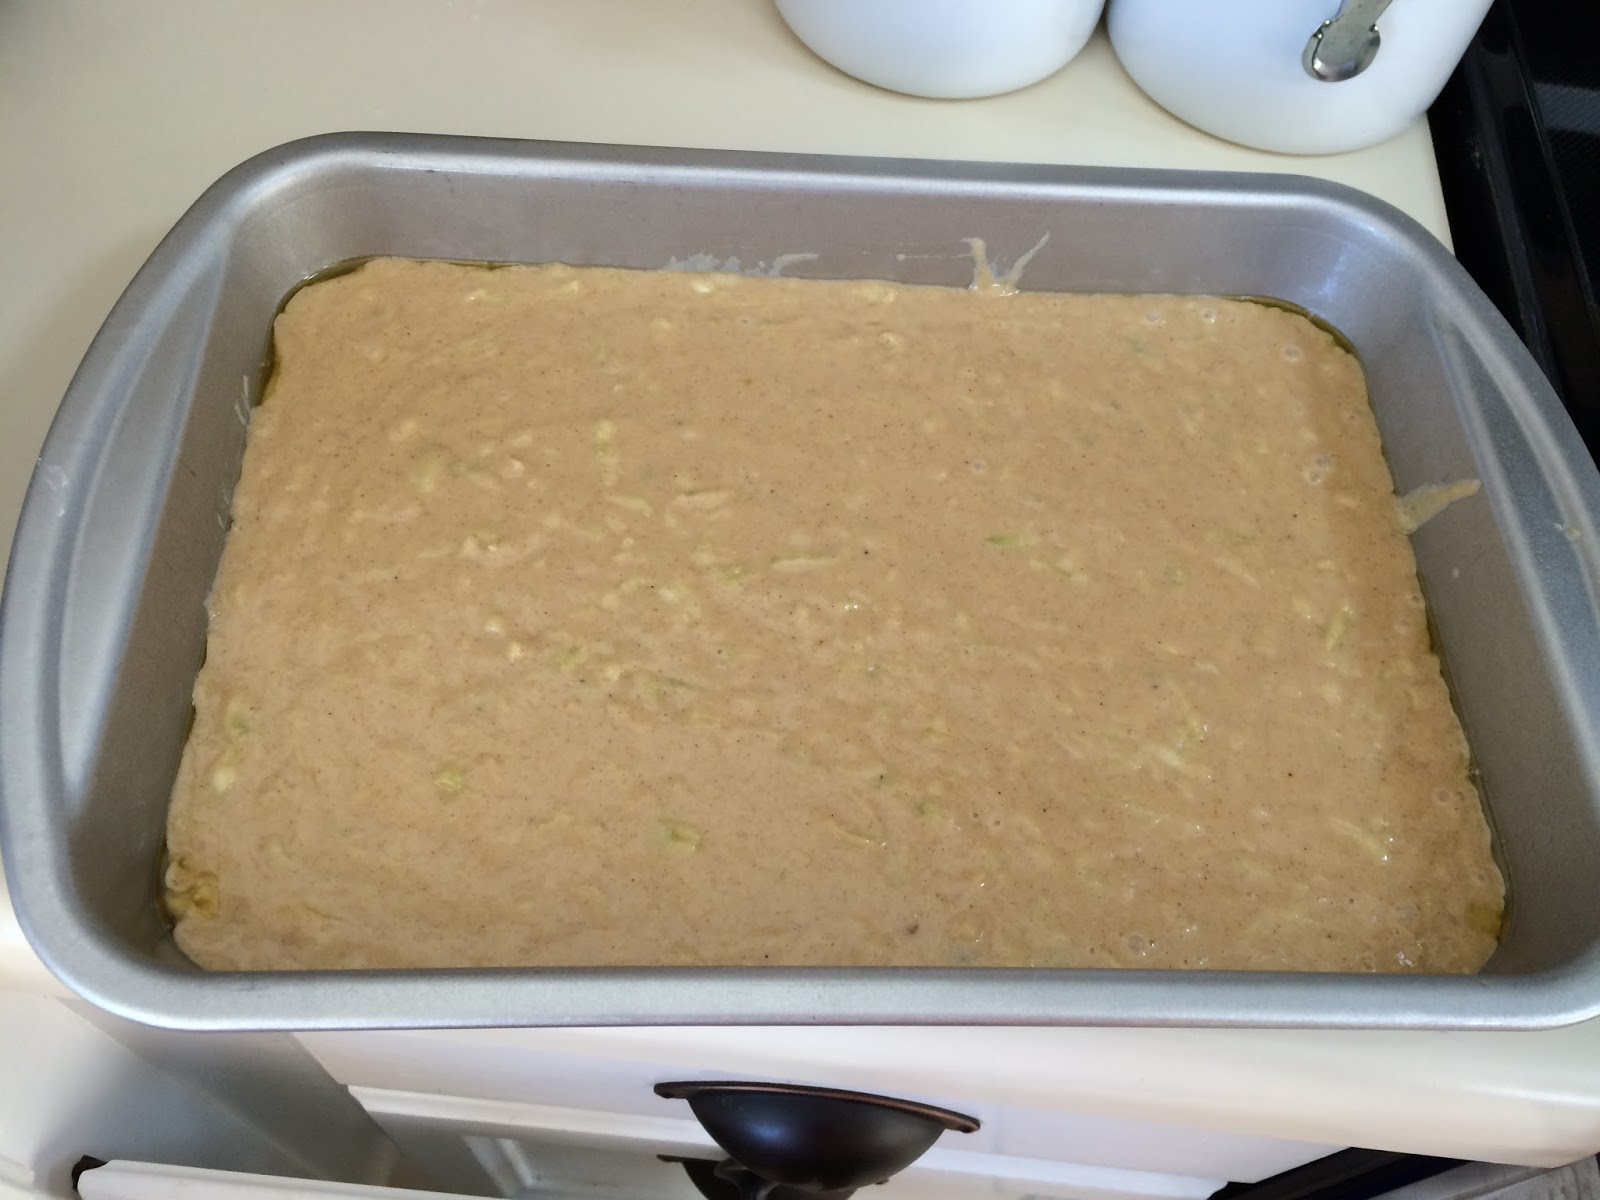
Grease up a 9x13 pan with cooking spray and pour in the batter. Bake the cake for 40-45 minutes until a toothpick comes out clean!

Perfecto!The middle sank in just a titch, but it just made a deeper valley for all that delicious frosting to go in!

While the cake is cooking, whip up the frosting.
Cream together the cream cheese and butter in a mixer or using a hand mixer. Gradually add the powdered sugar until it's nice and thick! I like mine a bit more sweet and a little less cream cheese-y.                                                 
Frost the cooked cake and sprinkle with the turbinado sugar and cinnamon!

It was oh-so-good! The cake is really like a spice cake and the frosting is the perfect balance! A little sugar and cinnamon on top just adds a some fall flavor and crunch! It was a hit, even with all that zucchini!


Sunday, January 31, 2016

Butter Beer and good old Harry Potter

We have been taken over by the wizarding world at the Wood house! Callie started reading the Harry Potter series at the beginning of the school year and she has just fallen in love with these books.

Last week we finished off the third book, The Prisoner of Azkaban, which is my favorite book! So we decided to celebrate this Saturday, by watching the movie and trying to make Butter Beer.

It is quite a process let me tell you!
You need
1 cup of brown sugar
2 tbsp of water
6 tbsp of butter
1/2 tsp of salt
1/2 tsp of apple cider vinegar
3/4 cup of heavy cream
2 liter of cream soda

First in a sauce pan mix the sugar and water together and heat up over medium.

Bring the mixture to a boil and let it get good and caramel-y. One recipe I found said to heat it to 240 using a candy thermometer, but I didn't have one so I just let it boil for about 3 minutes until it was smooth and not grainy.
Removed from heat and stir in the butter, salt, cider and 1/4 cup of the heavy cream until it is smooth. Next let the mixture cool back down to room temperature. This was the longest part, waiting.
After it has cooled down, whip 2 tbsp of the brown sugar mixture with the remaining heavy cream using egg beaters. The recipe suggested about 3 minutes of whipping, you want it creamy but not totally whipped cream texture, if that makes sense.
Finally the good part... Spoon the brown sugar mixture into a cup. We used Brien's beer mugs, a big scoop for both!

 Then, pour on the cream soda, we filled the glass about 3/4 full. Stir the mixture.
Last top off with the cream! 
So the verdict is...Butter Beer is weird. It's a little like a super sweet, warm, root beer float. Callie LOVED it, I thought it was okay and Brien was NOT a fan. So maybe not for everyone, but it was worth a try! 
And by the by, the book is SO much better than the movie!


Tuesday, October 21, 2014

Gooey Butter Cake and Frown Lines

Today was a rough day. My face hurts, from frowning. I feel like I might need some botox in the near future. Sometimes my students act like they have no idea what's going on. Then I had to conference with them about their test results regarding reading levels. Those were some tough conversations. I have really nice students but they have come from 5th grade with 3rd grade average for reading levels. Hello growth scores! They are going to be great!

Besides being a loonnngg day, I have parent conferences from 4-8 tomorrow, so that makes for some 14 hour days. Fall break cannot come soon enough! When days like this happen I needs something delicious to tame my frayed nerves. Enter Butter Cake.

If you are ever in need of a quick and easy dessert, have I got a recipe for you! Last Saturday after the pumpkin patch we had a yummy dinner and I was asked to bring some dessert. So I threw together a little butter cake action! I got this recipe for one of my sweet church friends, when I lived in East Texas and I used to make it all the time!

You need:
For the bottom layer:
One box of yellow cake mix
One stick of butter, melted
2 eggs 
1 tsp of vanilla extract

For the top layer:
1 8 oz package of cream cheese, softened (for the record I used 1/3 fat, you know, to make it healthier)
I box or 4 cups of powdered sugar
2 eggs
1 tsp of vanilla

1. Pre heat the oven to 350. Mix up the ingredients for the bottom layer and press into a greased 9x13 pan. It will be a little dry, just smoosh it right in there.


2. Next, Mix up all the ingredients for the bottom layer except for the powdered sugar, using an electric mixer, I used my trusty Kitchen Aid. Next gradually add in the powdered sugar until everything is smooth. Then pour over the top layer and spread evenly.


3. Pop it into the oven for about 40 minutes. I always check on it and end up adding 5-10 minutes of additional cook time. The top should be golden brown and pretty firm.
Like so...
Slice those babies up into brownie sized chunks and you have tasty treat for those times when you need an on the fly dessert OR if your face hurts from frowning!

Sunday, September 14, 2014

Home Made Pretzels


Who loves carbs? I do, I do! I always want to make my own bread and dough and such, but you see, I have this irrational fear. I am terrified of yeast. I mean, it's alive and you eat it! YIKES! Plus I always mess it up. This recipe was calling my name, pretzels, yum! Even though it called for yeast, I decided to just try it anyway. It's a little involved, but so worth it! Mine didn't come out very pretty, but they tasted delicious and that's what really counts.
Here is the original recipe

You need:
1 1/2 cup warm water
1 packet of yeast
2 tablespoons sugar
4 cups flour
2 teaspoons sea salt
4 tablespoons butter, softened
1/4 cup baking soda
2 quarts water
1 egg, lightly beaten with 1 tablespoon of water
course sea salt 

First make the yeast according to the package. 
Let it get all foamy...
It's alive!
Then add in the flour, salt, baking soda and butter. Then knead it and form it into a ball. Then put the dough ball into a bowl and let it rise some where warm for about an hour covered with a towel. This is the part that I was afraid of, so I went to the store and prayed that it worked. When I got home it was a fluffy, puffy, dough ball, success!

Next cut the dough ball into pieces on a floured surface. Then line 2 cookie sheets with parchment paper or foil that has been sprayed lightly with cooking spray. 
Not very pretty...but it will do!
Then cover with a towel again and let them rise for another 30 minutes. There was a lot of waiting during this recipe. I am glad I had things to do!

After they are all puffed up again, preheat the oven to 425 and put the rack in the middle of the oven. Next boil up some water in a sauce pan. Then here is where it got a little hairy. The recipe calls for adding in 1/4 cup of baking soda when the water reached a rolling boil. Well, I dumped in the whole cup all at once and it was an explosion on my stove of foamy baking soda-y water!

 I would suggest adding it very gradually and stirring while you add. 
Then turn down to a low boil. Next, here's the weird part, you add the dough right into the boiling water for 30 seconds, then flip and let it boil for another 30 seconds.
My baking soda mess!


 Place the dough rolls onto a paper towel to dry off a little and then transfer them back to the greased baking sheet.

 After all of the rolls have been boiled, brush the top with a beaten egg/water mixture and top with salt. 

Make slits in the dough (I guess to let the yeast breathe??)

Then bake them at 425 for 20 minutes. They make all kinds of popping and bubbling sounds in the oven, but when they come out it's magical!
They were amazing! The dough was a little dense, but I shared them with my family and I am pretty sure they were a hit! Next time we are going to experiment and try actual pretzel shapes, we shall see how that goes! Happy baking, yeast lovers!


Thursday, July 17, 2014

Monkey bread pizza and a Frozen scavenger hunt

On Friday nights at the Wood's we all look forward to pizza or Chinese food and a movie. We were getting a little bit sick of regular old pizza, so I found some new fun recipes. One that caught my eye was monkey bread pizza! Yum! I love breakfast monkey bread, now for dinner, awesome! I found the recipe here...
Of course I tweaked it a little...

The first time I made this I made it in a bundt pan. It made waaayyy too much and it was almost impossible to get out even though I greased that sucker up pretty good.
You need:
A round cake pan
1 roll of Grands biscuits
pepperonis, mini or regular sized just cut into halves
2 cups shredded mozzarella
1/2 cup of shredded Parmesan
1/4 olive oil
1 tbsp of Italian seasoning
1 tsp garlic salt

Pre-heat oven to 350 and grease the cake pan
1. Quarter each of the 8 biscuits in the can
2. Cut up or add the pepperoni
3. Mix the oil and spices together and toss with the dough and pepperoni
4. Stir in the cheese and spread out in the pan


5. Pop in the oven for 30-45 minutes. The original recipe says to cook for 30 minutes, but our dough was still a little raw. So we ended up cooking it for about an extra 15 minutes.

6. Run a knife around the edge of the pan after it's out of the oven and flip upside down on a plate.


We like to dip our gooey cheesy goodness in marinara sauce and enjoy a movie while we eat! This week it was Frozen, again. We can't stop watching this movie, it's always on, sometimes just in the background.
The same day we made our monkey bread, we were rained in for the afternoon. So I found the cutest quiet fun thing to do with Callie, while Kellen took a nap.

It is a Frozen scavenger hunt! Here is the link...http://sisterssuitcaseblog.com/2014/03/frozen-game-printable-scavenger-hunt.html

All you do is print out the cards and then hide them around the house, using the clues to guide you. At the end of the scavenger hunt, I hid Callie's allowance for the week, but it would be super fun to hide some Frozen related prizes!


Callie had a blast trying to figure out the hints and you have to really know the songs from the movie to be able to get around the clues. It was way time consuming and fun on a rainy day!