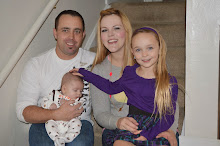
While pretty, they just looked like photos glued on a canvas. The ones that you can have made professionally cost upwards of $40, no thank you. So I googled some tutorials and found this one
Now, we're talking! This girl made them look real, so I decided I could too!
You need:
Photos (duh)- I made 11x14 POSTER prints of the pictures I wanted. They were $10.99 and I used a coupon code to get them for $8, not bad so far.
Modge Podge- I had some in the basement, but I wanted a fresh jar for this project $6
Canvas- I went with canvases that were a little smaller than my pictures so I could get the wrapped look. A 2 pack of 9x12 was $8
Paint brushes: I used a super cheap brush that I hadn't even used in the basement
Duct tape: Done, we had tons thanks to Callie.
1. Brush a light layer of modge podge smoothly on the front of the canvas.
2. Center your picture and press down. I stacked some books on and let it dry a little.
3. Brush another layer on the top side of the canvas and fold the picture over. Flip the canvas and with the duct, tape the picture down on the back side of the canvas.
4. Next repeat on the bottom side of the canvas, and secure with duct tape.
5. Here's where I got a little nervous. The photo paper is pretty thick and I didn't want to crease my photo. So, I modge podged the edges and folded the photo like I was wrapping a present and tightened it down with the tape.
6. Finish up the last side and then make sure that the back side of the photo is totally taped down.
As was suggested on the original website, you can stop here or give the photo some texture. I chose this option because I wanted to protect the picture from anything that could damage the bare paper. soooo....
Brush a light layer of modge podge directly on the front on the photo and press another framed canvas on top of it for a few seconds. Then lift it away and you have glorious texture!
Repeat the same steps for the sides. Let it dry totally and you are done!
I love how these came out and I am currently working on two more. Total cost for all 4=$52 as opposed to $160, money saved $108, score! I can't wait until they are ALL finished and the Mister hangs them!


No comments:
Post a Comment