Showing posts with label desserts. Show all posts

Monday, January 29, 2018

Peanut Butter Bars

Do you love Reese's cups/anything with chocolate and peanut butter? Well then, this is the recipe for you!

I was going through and cleaning out some of my pinterest boards, they were out of control and I couldn't find anything, when I stumbled across this yummy recipe for "Buck Eye Bars". I am not an Ohioan or whatever they call people from the Buck Eye state, but I can get down with a good old dessert.

I forgot to take pictures as I went, but my food photographer captured the afters and they are as good as they look!

You need: 
For the peanut butter filling:
2  cups of powdered sugar
1 cup of creamy peanut butter
1/2 or 1 stick of melted butter
1/2 cup of brown sugar

For the chocolate topping:
1 bag of milk chocolate chips
1 tsp vanilla
2 tsps melted butter

First, grease up a 9x13 pan with cooking spray or butter, we went with butter. In retrospect, I think I would use a cookie sheet so that peanut butter to chocolate ratio was closer, but...live and learn.

Next mix up the ingredients for the filling. Mix the peanut butter, butter and brown sugar first, then add in the powdered sugar gradually. I just used my good old hand mixer, but I think the Kitchen Aid would have been better.

The filling is pretty dense and doughy, but they should easily roll into balls and not fall apart, thus, adding in the powdered sugar a little at a time until you get the right consistency.

Next press the mixture into your greased up pan. 

Then melt the chocolate for the topping. I just dumped everything in a bowl and went with the microwave at 30 second increments, until it was smooth and creamy. Then pour over the peanut butter. After a quick trip the fridge to harden up, we dusted it with powdered sugar to pretty things up! We ate them at room temp, I don't enjoy cold chocolate, but it's what you prefer!


They came out so yummy and pretty. I can't wait to try them again with some adjustments. They are SO much easier than rolling up the dough and dipping them! Give it a try, they will not disappoint!


Tuesday, September 19, 2017

Peach Upside Down Cake

Hi there. It's me,, still using up all the peaches! If you, like, the Wood's/Wathen's, enjoy peaches or have an overabundance to use up... I have good news for you! Well not news, a recipe!

It was pretty simple and made for a simple and light dessert for Sunday dinner fun! 
Here is the recipe...

We already had most of the ingredients and the only think I did differently was use a 9x13 cake pan (cause I don't have a spring form pan dish thingy???) and I used white cake mix instead of yellow.

All you do is whip up the cake mix according to the directions. Set that aside and make the glaze for the top (butter and brown sugar is always a winner!) Pour the glaze in the greased cake pan, lay the peach slices on top of the glaze and then top with the cake mix. Pop that in the oven and then relax while it cooks!

When it comes out, let it cool for a titch and then turn it over on a cookie sheet. It was deliciouso. My only fix to this would be to add more peaches to the cake mix and not let it cook so long, it was a teensy bit dry, but no one seemed to notice or care. I feel like should be served with ice cream or something to make it more sweet! 

You know you want a piece! Peach lovers unite!


Wednesday, June 21, 2017

What's Cookin' This week: Blueberry Cupcakes

We are all out of  sorts and not on any kind of schedule this summer! Yikes, I am usually better than this! Thanks to another week of school stuff (just getting professionally developed in teaching reading) we have not been home ALL week, again.
This week is math and VBS, then the family reunion, so not really getting any less busy!
My eldest keeps quietly reminding me, that she will be sticking to the schedule she created years ago and so far, she has done it!
Last Wednesday, due to an overabundance of blueberries in the fridge (I am talking 8 pounds, y'all) she decided she wanted to make blueberry cupcakes.
All the berries!
She did everything, followed the recipe exactly, and they were AMAZING!  So I thought I would share!
Here is the link...http://www.foodnetwork.com/recipes/ree-drummond/missys-lemon-and-blueberry-cupcakes-recipe-1995516

I am not talking light and fluffy cupcakes. They are rich and sweet and SO good and I think I may have found my new food photographer!


She even garnished them with mint leaves from my herb garden. How cute is that?!

Do you see what I am talking about with these pictures, yum!
So that's what's cookin' around here, hopefully next week, since we are finally free to enjoy the summer, there will be lots more yummy treats to share about!


Tuesday, May 9, 2017

Kentucky Derby Book Club

This last weekend, we had another chapter chat! I heart my girls and I love getting together with them every few weeks. Sometimes we get around to chatting about the book, but mostly we just hang out and that is A-okay with me!

Last month our books was...
It was pretty amazing, I am not going to lie! It's been a spell since I read it, but I know that I finished it in like 3 days, when Kellen was sick and refused to take medicine a few weeks ago. 

It's the sequel to a book we read a few years ago, The Kitchen House and it picks up many years later with the main character Jamie, who at the end of the first book finds out that his mother is one of the slaves on his family's plantation, after being raised by wealthy his grandmother, and escapes his crazy family and past. The book starts with him being a successful business man living as a white man with no one suspecting his past. Then the plot twists begin. The man who saved him as young boy shows up at his door, with his own son, Pan and asks him to raise him as a servant in his house to keep him safe from slave traders. Well, old Pan decides to go down to the docks one day to buy a parrot to win over his boss and gets himself kidnapped by slave traders. Jamie decides since Pan's father, Henry, saved his life, to go after him back to his old town and enemies there are still out to kill him. The book goes back and forth between past and present and tells all the back stories of the characters and how they came to be where they are since the last book left off. There is lots of drama and controversy and secret things going with the underground railroad and escapes and captures, all the crazy things that you should love in book, this one has got them! So stinkin' good! 

Since it was Derby day and our books was pretty southern, I decided our food should be pretty southern as well.

Let me tell, it was a day of cooking firsts for this girl! I decided we were going have to Kentucky Brown sliders (never have eaten one in my life!) Deviled eggs, because, yum ( never made those either. Sad, right?) Pecan Pie (You guessed it, never made one of those either!) and Mint Juleps (Minus the bourbon, and nope, never tried that either)

So here's the crash course and the lessons, I learned!

First up: Kentucky Browns!
You need slider bread, I went with good old Hawaiian rolls
1 lb of sliced turkey
1 large tomato
10 slices of bacon
 1 stick of butter
1 tbsp of flour
1 cup heavy cream or milk
1 cup Romano cheese (I couldn't find this except in the deli and the line was super long, so I went with grated parmesan)
minced garlic
1 tbsp mustard
1 tbsp Worcestershire sauce

1. Preheat the oven to 350
2. Slice all the rolls in half and brush both sides with a little melted butter.
3. Layer on the turkey and tomatoes
4. Whip up the cheese sauce! Make a rue by melting the butter and then whisking in the flour, let that cook down for about 2 minutes until it simmers. Then add in the milk/cream and whisk, whisk, whisk. Once it starts to boil removed from heat immediately and add in the cheese. I had a little bit more milk in to smooth the sauce out. Then add in some salt and pepper.
5. Layer the sauce over the sammies.
6. Add on the bacon and then put the bread tops back on. 
7. Mix in the garlic, mustard and Worcestershire sauce into the rest of the melted butter and then brush on top of the sliders.

Cover with foil and bake for 10 minutes, uncover and bake about 5 minutes longer to crisp up the tops. My tops got super toasty, cause you know we got to talking and I forgot the set the timer.

They were SO messy and a little gooey from the cheesy sauce, but they came out alright!

Next up deviled eggs!
So remember when I said I have never made these before, true facts right there. It's because whenever I make hard boiled eggs, I always crack half of them and they just end up an icky mess!

Thus, I had to make the perfect eggs! You better believe I googled that nonsense and found out how to make perfect hard boiled eggs. They were in fact perfect, so here's watcha do...

Put the eggs in the empty pot. Duh, that way they don't crack, you think I would know these things!
Then cover with cold water. Then put it on the stove on high. When the water is at a rolling boil take em off the burner and cover the pot with a lid. Let them finish cooking in the hot, hot water for another 17 minutes. Then rinse with COLD water. That's it.

They were amazing! No cracked eggs, the yolk was soft and creamy and the shells practically peeled themselves they came off so easy!

The rest you can probably figure out yourself, but you cut the eggs in half and scoop out the yolks and mix in mustard, mayo and vinegar. The fill the egg whites and top with salt and paprika.

I forgot to take a picture, but they came out really nice!

Pecan Pie!
This was probably one of the easiest pies I have ever made, ridiculous really...
You need:
a pie shell
1 cup of pecans (I used chopped)
1 cup of chocolate chips
1 cup of light corn syrup
1/2 cup of white sugar
1/2 cup of brown sugar
4 eggs
1 tsp vanilla

1. Preheat the oven to 375.
2. Lay out the crust in your pie plate and pinch the edges.
3. Evenly pour the pecans and chocolate chips right into the pie crust.
3. Mix up the corn syrup, sugars and beat on the eggs, then add the vanilla.
4. Pour the mixture over the pecans and chocolate.
5. Bake for 30 minutes on the top rack then move to the bottom for about 20 more minutes


It too got a titch too done, because I decided to take a shower the last 20 minutes it was baking and I didn't hear the timer going off. It was still mighty tasty even with the top being a little crunchy.
It was yummy-oh and I will totally make this again, but with a little less cook time!

Last but certainly not least, Mint Juleps!

I am not a huge Bourbon fan and we actually didn't have any in our house, so Vodka it was!
But first you have to make a simple syrup, another cooking experience!

You need:
2 cups of sugar
2 cups of water
mint leaves
lime juice (we actually used limeade) 
vodka
Berries (for pretties! I used black berries)

First you gotta make the syrup. You just add equal parts water and sugar. I used 2 cups. Then stir, stir, stir over medium heat. When it is completely clear, seriously, no cloudiness, and it's starting to bubble just a little on the sides, remove from heat. Then add in the mint leaves to infuse the syrup while it 
cools.


When the syrup is cooled, remove the leaves and store in a air tight container!

To make the drinks, I just added ice, a few shots of vodka, a few tablespoons of syrup and the limeade into a shaker, then pour over berries into a martini glass and enjoy book club with the girls!

  

Thursday, April 27, 2017

Baby Cherry Pies

Hello again! Need a great dessert recipe? I got one just for you! Normally I am not a huge pie girl, but when they are tiny and cute, sign me up!
I found this recipe on pinterest and decided to modify it a titch and they were delicious and just the right size for an after dinner treat!
I should have cracked this one open to show the ooey gooey filling, but I just not a great food photographer!


You need:
1 can fruit filling, I used cherry, I suppose you could use anything!
2 pre-made pie crusts, I am sure you could make some, but pie crust is also not my jam, so ready made it was! 2 crusts made 10 baby pies
4 inch round cookie or biscuit cutter
1 egg white
1/4 cup of milk
1 1/2 cup of powdered sugar

Preheat the oven to 400. Lay down some parchment on a cookie sheet.
The recipe is really super easy. All you do is roll out the pie dough when it gets to room temperature. I fetched my wooden roller out from the depths of the cabinet full of things I don't really use for this one! I rolled the dough to be a little thinner than it comes to stretch out my dough usage.
Next cut out the circles, like so...

Next, top with the fruit filling. Seriously small scoops here. My first few were a little large and they definitely oozed out! 

Next top with another dough circle and press the edges shut with a fork.
Then place on the parchment lined cookie sheet and brush the tops with the egg whites.
 Pop those babies into the oven for 14 minutes.

While they are cooking whip the powder sugar and milk.
After the pies come out (again, I should have taken a picture!) let them cool for about 15 minutes on the sheet. 
While they are still warm, carefully dip them, both sides, into the icing. I just used a spoon and spatula to dip and retrieve and to my surprise non of them fell apart! Hurray!
Then put them back on the parchment to cool and let the icing harden.
Serve with ice cream or cool whip.
They were super yummy and oh-so-easy to whip up! 


Friday, April 14, 2017

Pineapple Pie

I love dessert. There is just no way around it...I could seriously eat sweets all day, every day. I have a problem.
Speaking of dessert. You need to walk not run to the local store to make this deliciousness. And it's so easy, it's scary.

Ready for the the ingredients?

You need:
1-20 ounce can of crushed pineapple
1 premade graham cracker crust
1 cup of sour cream
2 3.4 ounce boxes of vanilla pudding mix (I used the no cooking kind. I have not a clue if it makes a difference or not!)
1 tub of cool whip

1. Mix up the pudding and sour cream and then fold in the pineapple, no need to drain. The crushed pineapple is not super liquidy.


2. Add to the pie crust.

3. Pop in the fridge for at least an hour. Or in my case in the freezer for like 45 minutes.
4. Last, frost it up with some cool whip topping. That's it, for real!
It didn't slice up super pretty, but let's be honest, it's the taste that we need and care about.
This one was a winner! Light and yummy and easy. I seriously cannot wait to make it again this summer for a tasty treat!


Tuesday, February 28, 2017

Kitchen Sink Cookies

This weekend after all the sickness, we needed some cookies.  It's not as if we did not have pounds of candy laying around from Valentines and needed more sugar, but some times you just want cookies. Or rather cookie dough...
I am telling you, we would be dead if this was true...

So kitchen sink cookies all started one day at school...One of my teammates has a sister that works for Panera bread and she full out stopped a meeting and was like, "Girls! Last night I had the best cookie..." she proceeded to tell us all about how she devoured a cookie that was the size of her head and had everything you could imagine in it. When we asked her what it was she couldn't remember the official name of it. Which lead us to grab our phones and or computers and do a furious search for said cookies. We found out they are indeed called, "Everything but the kitchen sink cookies". Therefore leading us each to agree to bake a batch and bring it to school on Monday. I love my team SO much!

My cookies were not the most amazing looking, but I highly suggest whippin' up a batch and giving them a try!

It's a pretty basic cookie dough, but the add ins are what makes it amazing!
You need:
1 cup of butter room temperature (I used salted)
1 cup of white sugar
1/2 cup of brown sugar
1 egg + 1 egg white
1 tsp vanilla
2 cups of flour
1 tsp baking powder
1 tsp of baking soda
1 tsp salt

Pre-heat the oven to 350.

First whip together the butter and gradually add in the sugars until it's nice and fluffy. Then add in the egg  and vanilla...
Like so...
Next add in the dry ingredients a little at a time, don't over mix. I think I mixed mine a titch too much and they were a little flat, but still super yummy.

After the dough is done add in the mix ins. We went all out, y'all! The title does not lie....
I crushed up pretzels, potato chips and fritos...a little salty, you know.
I lost my meat tenderizer mallet, so a spatula had to do...
Next, mix in 1 cup of your salty snacks! Then mix all of your sweet ingredients. We went with cocoa nut flakes, butter scotch chips, milk chocolate chips, craisins, and caramel bits. Yummm!

Then, add in 1 and 1/2 cups of your sweet ingredients. Again just mix them in nice and easy with a spoon or spatula, NOT the mixer!

After all of the mix ins are added, make loosely formed balls of dough and plop them on a parchment lined baking sheet.
Pop them into the oven for about 15 minutes! The first batch came out a little dark and more crispy than I liked. If your oven runs hot, like mine, reduce the time a little so they come out golden brown. My 2nd batch was MUCH better!

Let them cool and ENJOY!
They were oh-so-good and hit the spot!


Monday, January 2, 2017

Christmas Chapter Chat

I am a little late to the party on this one, but hey, it's still just barely January, so it counts! A few weeks ago in the subarctic weather the book club girls got together again. We have kept it going for a few months now and that is quite the accomplishment.

This month we chose a Christmas book, because we are cheesy like that. It was The Christmas Train. What an interesting book this was...
There was A LOT going on in this story and you just keep thinking: How are they going to wrap this all up?
It's about a man who is a former war reported, taking on a new story about traveling across the U.S by train during Christmas to see his actress girl friend in California. Well it turns out his ex-girl friend is on the train and they reconnect. Shocking, I know! Well in the midst of their finding each other his current lady meets him to travel the last leg of the trip. There are also all kind of side plots, a film production crew on board, a young couple getting married, the lives of the employees on the train, a thief and all kinds of drama at the end with a rock slide, train crash and recovery of the passengers.
I was not super crazy about this book, but it was fun to read and it kinda made me want to take a train trip somewhere!

Also for our December book club we always do a cookie exchange. Another fun tradition! We bring however many dozen cookies for how many people are coming and then you leave with a dozen of every one else's cookies.

I usually make some kind of minty cookie concoction, but this year, I needed something quick! So cookie cake bars it was!


I doubled the recipe, added more chocolate chips and M&M's, I don't know if I got the wrong kind, but I think I would leave out the pudding mix next time!

All the stuff you need, minus, eggs, oil and a titch of water!

Mix.

It's super easy! I love a cake mix cookie for obvious reasons. You don't have to measure out all those dry pesky ingredients, flour baking powder etc. So after you dump everything in, you just dump it again into a cake pan. I am sure that you could plop them down on a cookie sheet and have actual cookies, but I was all about speed and instant gratification, so bars it was!
Spread.
Bake.

And done!
Package those puppies up and you are good to go!


Sunday, November 20, 2016

Chapter Chat and Hot Chocolate Dip

Book club, I mean Chapter Chat, is back up and running. We took a little break for about a year because life was just too busy for everyone. Life is no less busy, but I missed getting together with my girls!

At our last meeting, my book reading buddy and I googled ways to keep your book club together, just for fun. One of the suggestions was to give your book club a spiffy name, we chose the cheesy ridiculousness of "Chapter Chat". Done!

                                        
At our meeting last weekend, we read The Girl on the Train. It was a super good read! I finished in like two days a few weeks ago when my kids were sick and I had nothing to do but sit on the couch and watch Paw Patrol.

It is about this crazy lady who rides the train to London every day and at one of the stops she sees a couple that she has made up identities for, like they know each other and are friends. Then it gets complicated... One day she sees the lady in the couple, who she has named Jess, kissing another man. Then some time later Jess, whose real name is Ann,a goes missing.


The main character Rachel, who is mentally a hot mess express, thinks that she has some important information about Anna's disappearance, but was black out drunk the night everything happened. There is also a crazy back story about Rachel's ex-husband and his new wife and they are all linked together by the missing girl.

If you like some mystery and suspense, this book is right up your alley, it is a great read...Now I can't wait to watch the movie!

If you like a sweet treat with your book, I have just the thing...Hot chocolate dip! This could be a game changer for parties in the future!
So easy and yumm-o!
You need:
8 oz cream cheese
1 tub of marshmallow fluff
2 packets of cocoa mix

First, whip together the cream cheese and marshmallow fluff  with a mixer until it is smooth. Then fold in the cocoa mix by hand...
Pop it into the fridge to firm up and chill for about an hour

Then go to town! We ate ours with Chips Ahoy minis and strawberries! I have decided that this would be deliciouso with any fruit! We will be making this again for sure!

Wednesday, October 5, 2016

Zucchini Cake

 Due to an abundance of over sized zucchini I HAD to make this treat! Yummy-o! This was so delicious for Sunday dinner dessert a few weeks ago, I have been dreaming about ever since.

I realize that zucchini is not a fan favorite around my house, but it seems like when I put vegetables in dessert that I am somehow making it a little more healthy! Right?!?

So this recipe is pretty straight forward you need:

For the cake:
3 cups of flour
3 cups of white sugar
1 tsp of salt
1 1/2 tsp of baking soda
1 tsp of baking powder
2 tsps cinnamon
1 tsp of allspice
1 tsp of nutmeg
1 tsp of cloves
1 tsp vanilla extract
3 eggs
1 1/2 cup of vegetable oil
3 cups of shredded zucchini

For the frosting
8 oz package of 1/3 fat cream cheese (softened)
1/2 cup of butter (softened)
2 1/2 cups of powdered sugar
2 tsps of cinnamon
3 tsps of Turbinado  sugar

Preheat oven to 350.

First shred up all the zucchini...
Wowza! My mama knows how to grow em!

Peel that bad boy!

Shred it right up using a cheese grater!

Whisk together all of the dry ingredients (flour, sugar, salt, baking soda, and powder and spices) in a medium sized bowl and then all of the wet ingredients in a large bowl (oil, eggs, vanilla)

Add the dry ingredients gradually to the wet ingredients. I used a good old wooden spoon for this step!

Next fold in the zucchini until combined. It's a weird texture with the cake mix and zucchini, but just go with it!
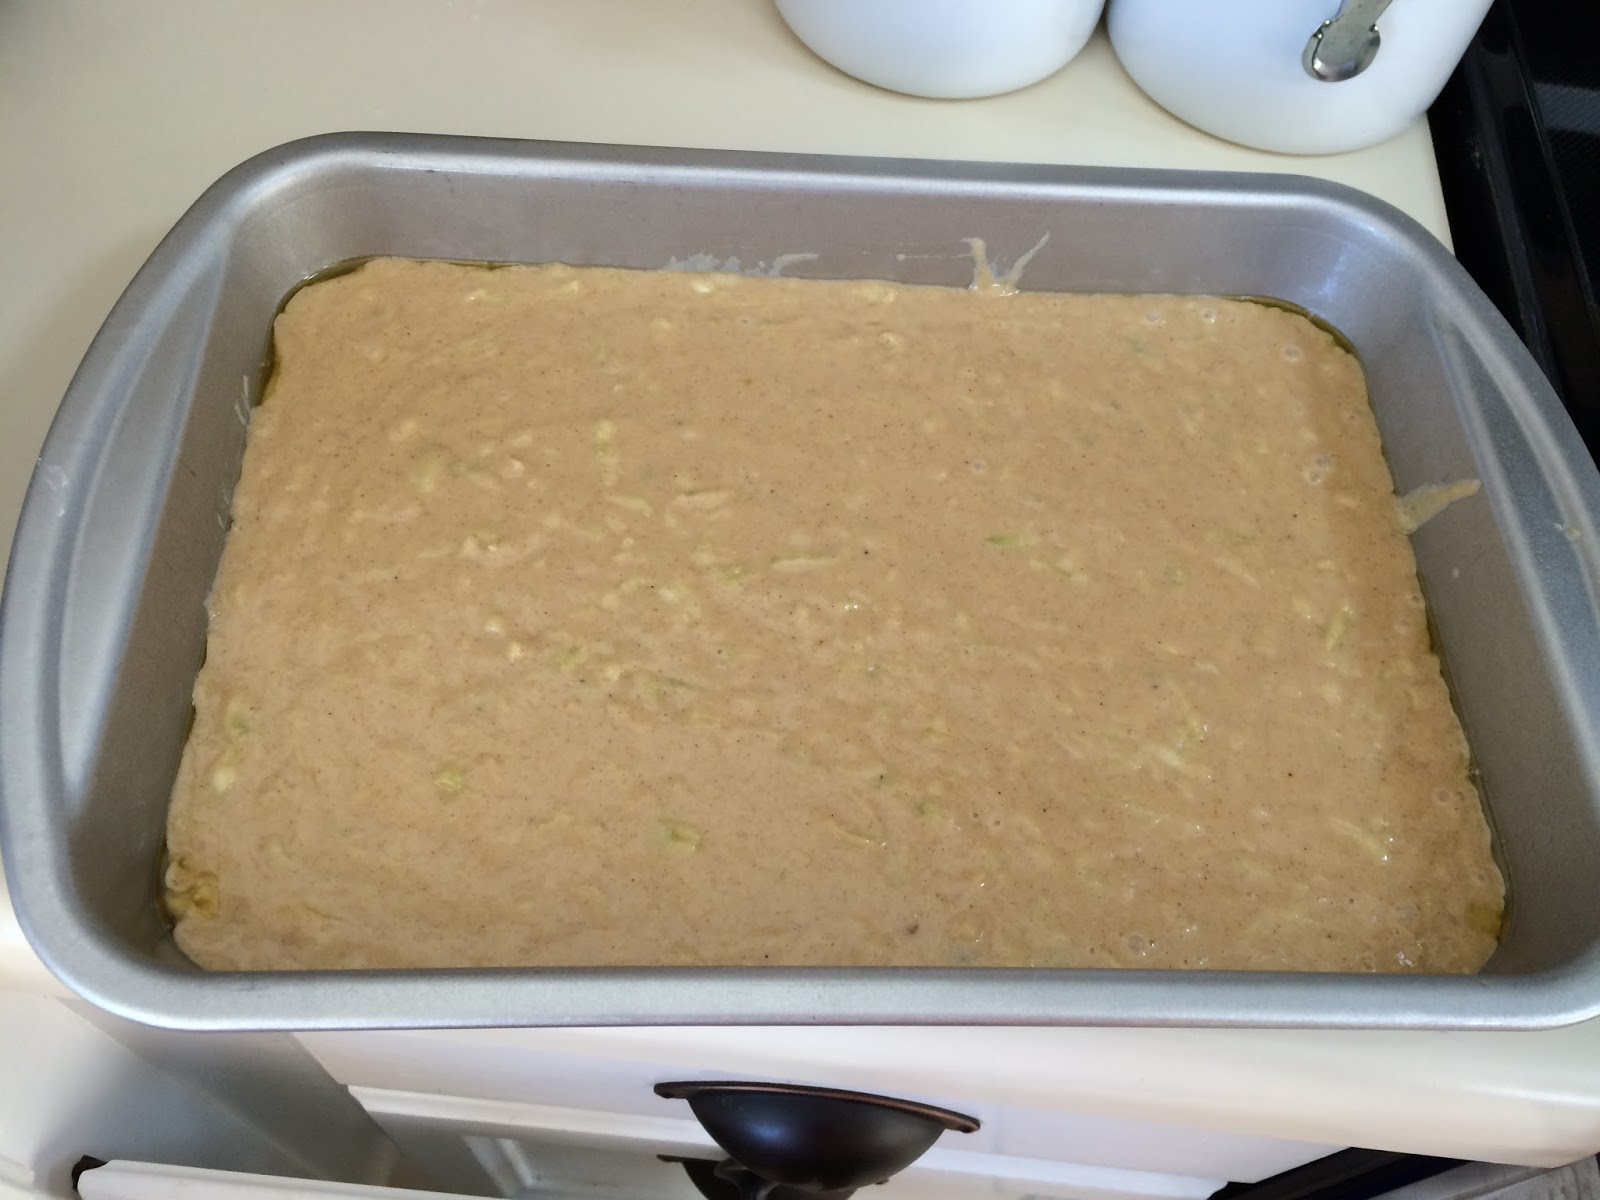
Grease up a 9x13 pan with cooking spray and pour in the batter. Bake the cake for 40-45 minutes until a toothpick comes out clean!

Perfecto!The middle sank in just a titch, but it just made a deeper valley for all that delicious frosting to go in!

While the cake is cooking, whip up the frosting.
Cream together the cream cheese and butter in a mixer or using a hand mixer. Gradually add the powdered sugar until it's nice and thick! I like mine a bit more sweet and a little less cream cheese-y.                                                 
Frost the cooked cake and sprinkle with the turbinado sugar and cinnamon!

It was oh-so-good! The cake is really like a spice cake and the frosting is the perfect balance! A little sugar and cinnamon on top just adds a some fall flavor and crunch! It was a hit, even with all that zucchini!


Wednesday, June 22, 2016

Lemon Blueberry Dump Cake, What's Cookin' Wednesday!

It's back! I am so excited it summer and time for cooking! A few weeks ago we whipped up this delicious treat for dessert on Sunday dinner and it was delicious!
Yummy!


Have y'all ever had dump cake? It has an unfortunate name, but it is oh-so-good! I am pretty sure it's called that because you just dump everything in and bake, yeah, let's go with that!

Traditionally you make dump cake with cherry pie filling and pineapple chunks, but I went rogue this time.

Here's what you need:

1 box of lemon cake mix
1 large can of blueberry pie filling (I think next time I might take this to the next level and add lemon pie filling as well!)
1 large can of pineapple chunks
2 sticks of butter

1. Pre heat the oven to 350.  First mix the pie filling anddrained pineapple right in a 9x13 pan, just dump and mix right there. No need to dirty up a bowl!

2. Next sprinkle the whole box of cake mix over the top of the fruit. It seems like  lot, but just do it, this is the "crust".
3. Then grate up the butter. Usually I just slice it up, but I decided to give this a try. It just makes the butter lighter and easier to melt!
4. Then sprinkle the cheese, I mean butter, over the top of the cake mix as evenly as you can. Just sprinkle right on top, DO NOT MIX IT!

5. Pop that pan right in the oven for about 45 minutes. I checked mine at 30 and it was getting close to being done!
Ta-da! The finished product!
Serve this up warm with some vanilla ice cream and prepare your mouth for a party! So easy and so delicious!